I currently have a simple Wordpress blog deployed in AWS. I already bought a domain name from namecheap.com, and I wanted to link this domain name to our Wordpress blog in EC2.
This was surprisingly very easy. The key is to setup a Route53 from a Hosted Zone, and link the DNS Servers in your Namecheap’s domain name settings page.
Steps:
- Log-in to your AWS Console
-
Associate an Elastic IP to your EC2 instance (if you haven’t yet). You need this so that the IP you configured wouldn’t change when you stop/restart your EC2 instance.
a. Navigate to Services > EC2 > Elastic IPs, and click on the
Allocate new address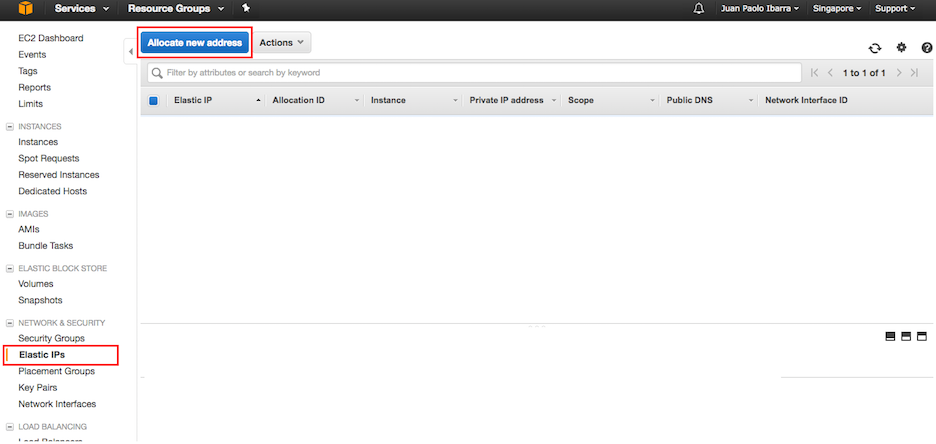
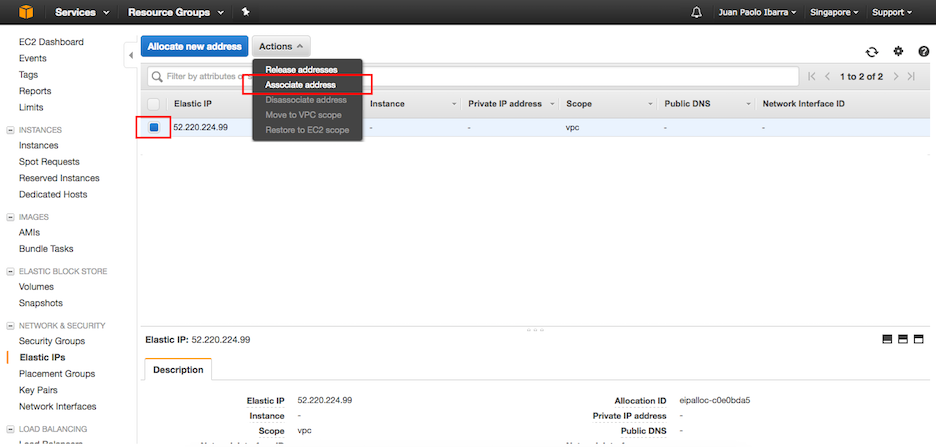
b. Associate your new Elastic IP to an EC2 instance
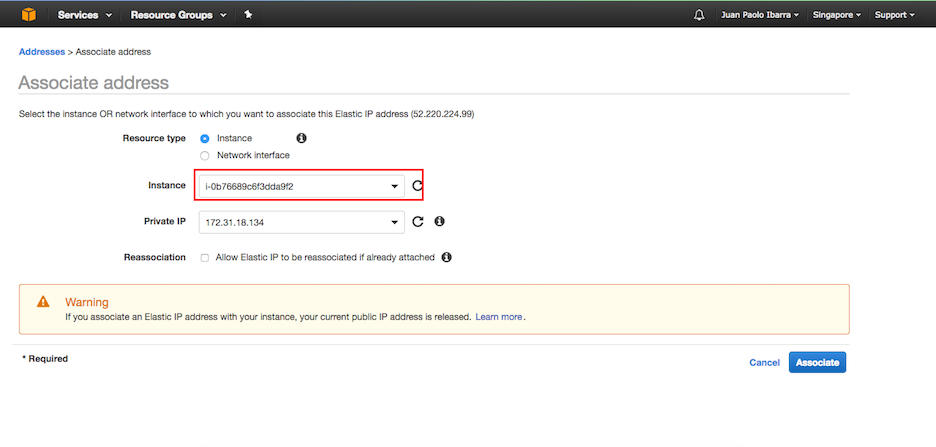
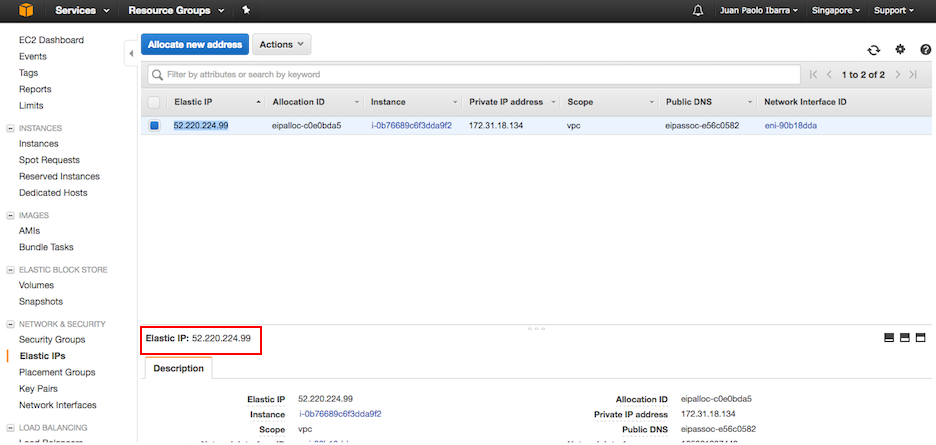
c. Take note of your Elastic IP because we’ll configure this to our Route53 later.
-
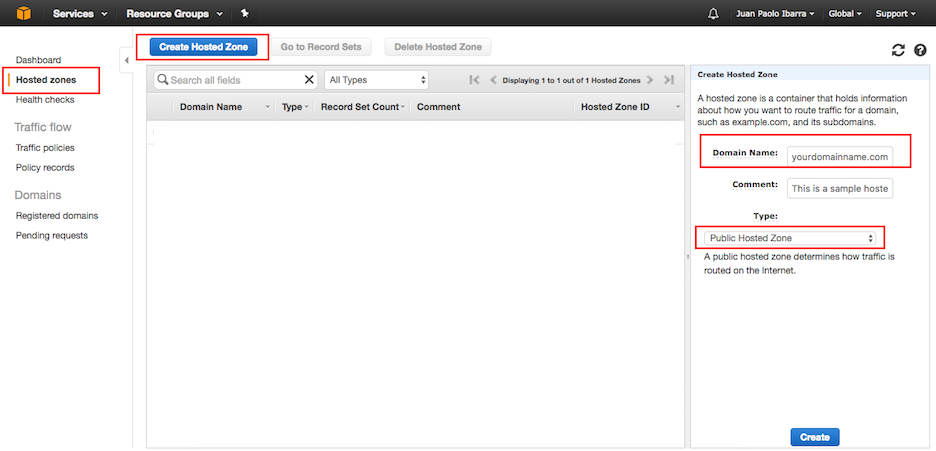
Navigate to Services > Route53 > Hosted zones.
a. Create a Public Hosted Zone
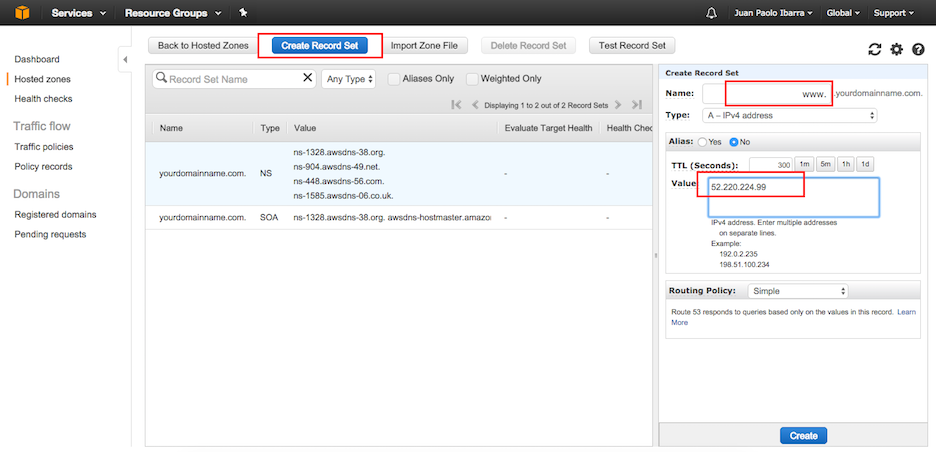
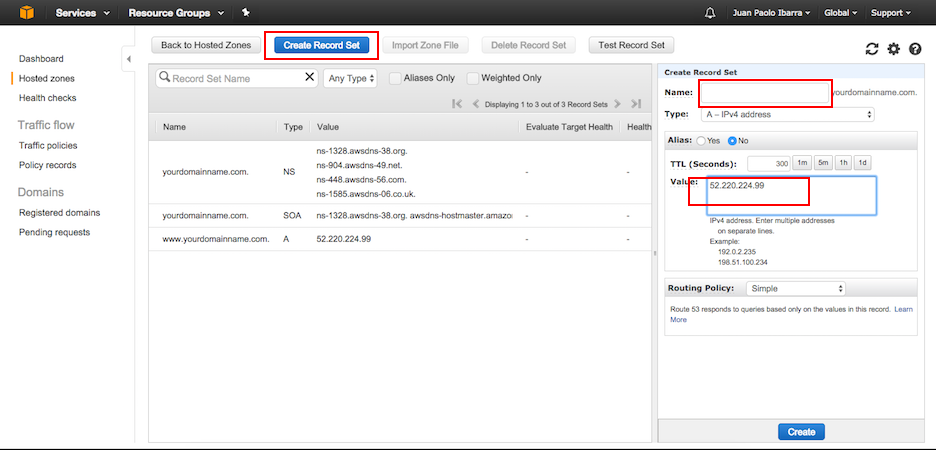
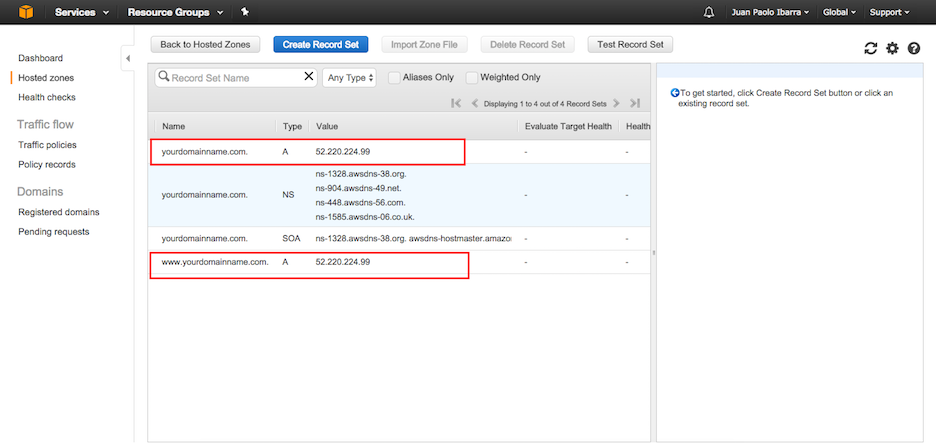
b. Create 2 A record sets: one for www, and another one for empty
-
Go to Namecheap.com, and navigate to your domain name’s settings page.
a. Copy over the DNS Servers from your Hosted Zone in AWS, into your NameCheap DNS Servers.
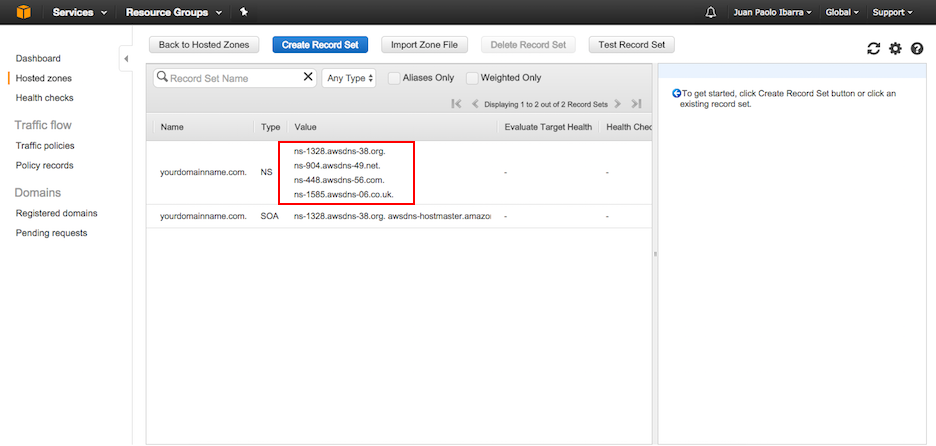
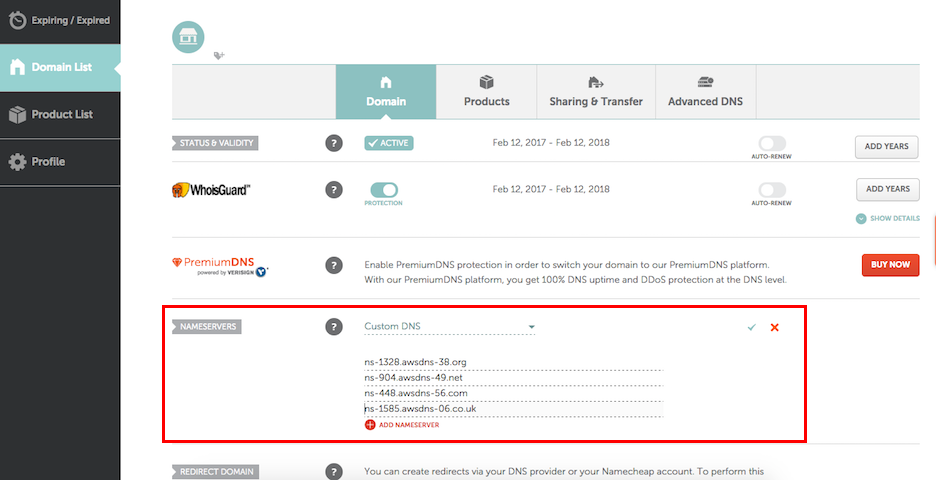
NOTE: Please don’t include the
.at the end of the DNS servers when you copy it over to Namecheap.com
–
And you’re all set. Don’t worry if it doesn’t work right away. It took my change a day before it was propagated.